Blog
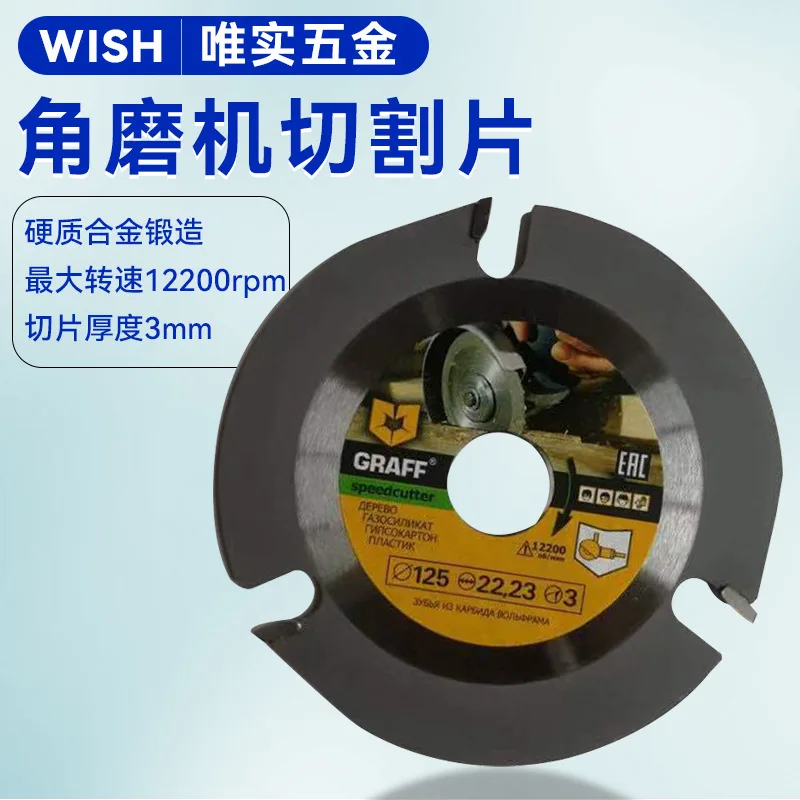
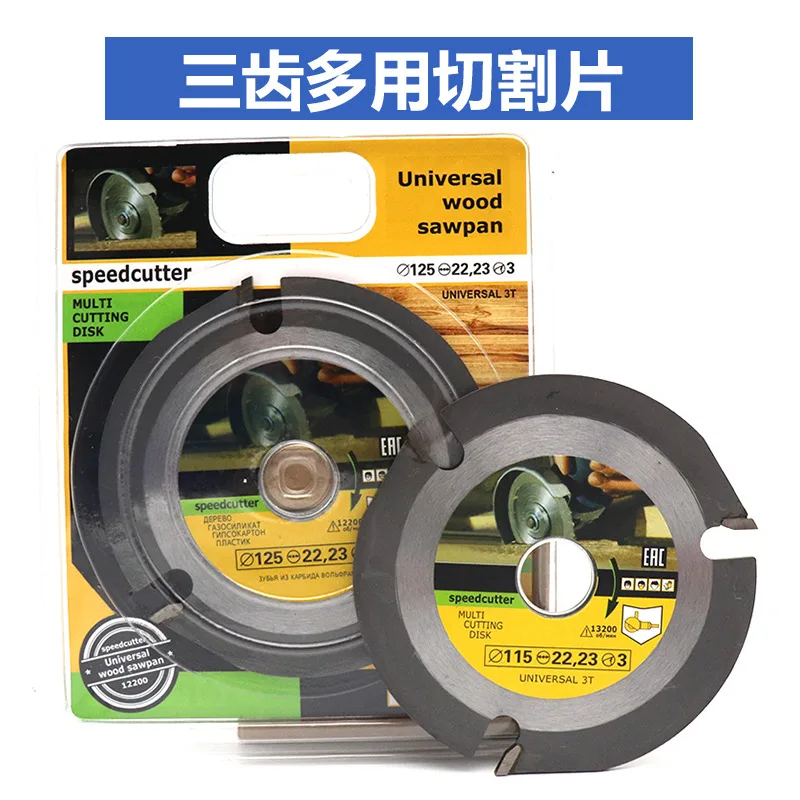
Carbide 3-Tooth Wood Grooving Blade: Choosing the Right Option


This guide answers the questions that come up before the money is spent on carbide 3-tooth wood grooving blade: what the figures mean, which option covers the work, and what to look at once the parcel is open.
There are 6 options in this range, running from $8.99 at the entry point to $17.38 at the top. Reading the option ladder before deciding is what keeps the purchase to one order.
The range at a glance
Before the detail, it is worth seeing the shape of the range. The figures below come from the listing itself rather than from a summary written alongside it.
| Item | This listing | What it tells you |
|---|---|---|
| Options available | 6 options | Each option is priced separately |
| Price band | $8.99 to $17.38 | The step between options is the specification change |
| Size or capacity span | 115 to 125 mm | Read the ladder below before choosing |
| Units used in the options | mm, t | The units you will be comparing against the job |
| Format | Variable product | How the options are structured on the site |
Sizing it to the job
Work through these in order. Changing a decision later usually means changing the order, which is why the dimensions are worth settling before anything else.
| Dimension | What it decides | How to choose |
|---|---|---|
| Grit or grade | Scratch size, and how fast material comes off | A sequence rather than a single number |
| Backing or bond | How it survives heat, pressure and edges | Paper for finish, cloth and fibre for load |
| Diameter and fitment | Which machine it mounts on and how much it covers | Matched to the tool’s guard and spindle |
The ladder below groups the options as they actually run, from the smaller end of the range to the larger, so the step between one part of the range and the next is visible at a glance.
| Part of the range | Size or capacity | Price | Where it suits |
|---|---|---|---|
| Smaller half | 115 to 125 mm | $8.99 to $16.18 | Everyday work |
| Larger half | 125 to 125 mm | $9.59 to $17.38 | Heavier work |
The Carbide 3-Tooth Wood Grooving Blade listing
The item this page is built around is listed below, with its current price and the full set of options.
What to check when it arrives
The table below is the arrival check. It is short, and every row has caught a genuine problem for somebody.
| Check | Why it matters | What good looks like |
|---|---|---|
| Rated speed is above the machine | An over-speed disc can shatter | A speed figure clearly above the tool’s |
| Grain suits the material | The wrong grain glazes or loads instantly | One grain for steel, another for stone |
| Backing is flat and undamaged | A bent disc runs out and cuts badly | Flat, with no creases or water damage |
| Fitment matches the machine | A disc that does not seat square is dangerous | Correct bore, flange and spindle size |
| Bond releases grit as it dulls | A hard bond glazes and burns the work | Bond matched to the material’s hardness |
| Storage keeps them flat and dry | Damp backing loses its strength | Sealed, flat, away from the floor |
Where these go wrong
Read the symptom first and the cause second. The instinct to add force or buy a replacement is usually the wrong first move.
| Symptom | Likely cause | What to do |
|---|---|---|
| Disc loads or glazes | Wrong grain, too fine a grit, or too much pressure | Change the grain, then reduce pressure and let the abrasive cut |
| Work discolours or burns | Too fine a grit, or a hard bond on hard material | Step back a grit and use a softer bond |
| Abrasive wears unevenly | Disc running out of true, or the work held at an angle | Check the flange and hold the tool flat |
| Finish shows scratches from earlier work | A grit was skipped in the sequence | Repeat the sequence and do not jump more than one step |
Abrasives and finishing in practice
Abrasives are consumed deliberately, so the cost that matters is the cost per part finished rather than the cost per disc. A product that cuts cooler and lasts longer is usually the cheaper one.
Grit is a sequence, not a single choice. Skipping a step leaves scratches that the next grit has to remove, and that work is what wears out both the abrasive and the operator.
The backing or the bond decides where the abrasive can be used. The same grain on paper, on cloth and in a vitrified wheel behaves completely differently under load.
Frequently Asked Questions
These are the questions that come up before an order is placed on Carbide 3-Tooth Wood Grooving Blade.
How do I choose a grit?
From the finish you need and the material you are removing, then work in steps. Jumping more than one grit at a time leaves scratches that cost more time to remove than the skipped step saved.
Why does the disc glaze instead of cutting?
Usually too fine a grit for the material, a bond that is too hard, or too much pressure. A glazed disc slides rather than cuts, and it heats the work instead of removing it.
Does the backing matter?
It decides where you can use the abrasive. Paper suits flat finishing, cloth and fibre take pressure and edges, and the wrong backing fails at the worst moment.
What is the danger with discs?
Over-speed and damage. A disc run faster than its rating, or one with a hidden crack, can shatter, which is why the speed check and the pre-mount inspection matter more than the price.
Cheap or branded?
Compare cost per finished part rather than per disc. Where the abrasive keeps cutting instead of glazing, the counted cost usually favours the better product.
Keeping it working
Upkeep here is measured in minutes, but it is what decides whether the item is still in use in five years.
- Store discs flat and dry; damp backing fails suddenly.
- Check the rated speed against every machine before mounting.
- Let the abrasive cut; pressure glazes the grain and burns the work.
- Keep belts and discs away from oil and water-based coolant.
- Inspect for cracks before mounting and discard anything suspect.
- Blow dust out of the machine after every session.
Ordering and what happens next
Because the options are priced individually, it is possible to order exactly the specification required rather than the nearest bundle.
The Carbide 3-Tooth Wood Grooving Blade page carries the current stock and the price of every option in this range.
If the choice comes down to two options, take the larger only where the work is likely to grow; otherwise take the smaller and put the difference into consumables.
The practical method is to write down the two or three figures that matter, hold them against the option list, and ignore everything else on the page.