Blog
G Clamp Sizes: Throat Depth, Jaw Opening and What to Buy

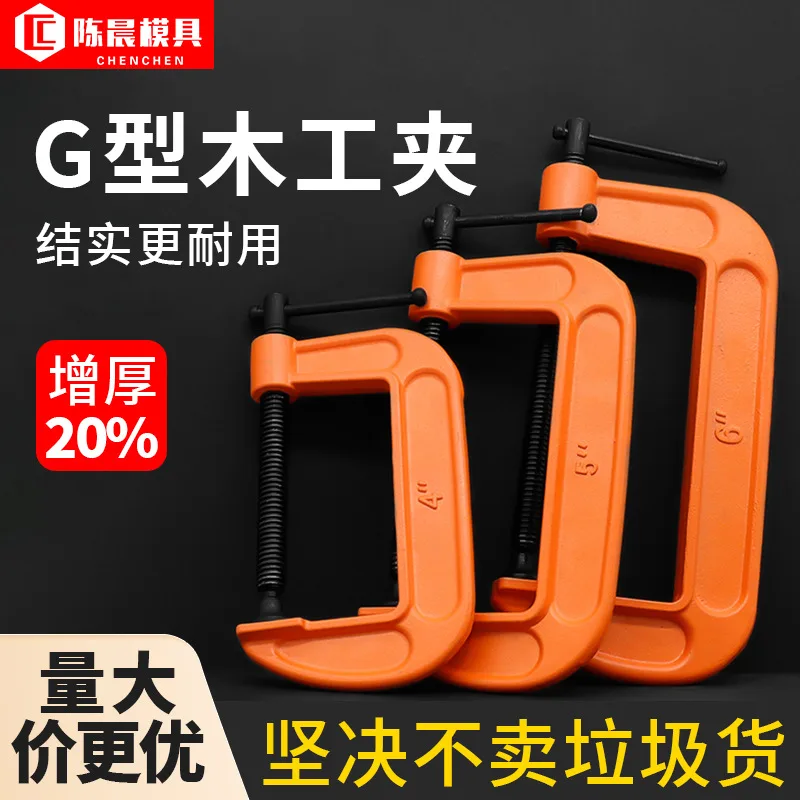
A G clamp is the simplest way to hold two parts together while glue sets or a joint is drilled, and it is also the easiest tool in the workshop to buy in the wrong size. The number on the clamp is only half the story: what actually decides whether a clamp will do the job is where it can reach and how far its jaws open.
This range runs from a 1 in clamp up to a 12 in clamp, which covers everything from a small repair to a full-width frame. This guide explains the two measurements that matter, how they divide the work between sizes, and how to clamp a finished surface without leaving a mark.
The two measurements that matter
The size on a G clamp is normally its jaw opening, measured between the faces when the screw is backed off. The second measurement is the throat depth, which is the distance from the screw to the back of the frame, and it decides how far the clamp can reach across a workpiece. A clamp with a large opening and a shallow throat will not go around a deep section, and a clamp with a deep throat and a small opening will not grip thick material.
| Measurement | What it decides | Why it matters |
|---|---|---|
| Jaw opening | How thick a workpiece the clamp can take | A clamp that is too small simply will not go on |
| Throat depth | How far the clamp reaches across the work | Too shallow and the frame fouls the workpiece |
| Frame section | How much force the clamp will take safely | A light frame flexes before the joint is closed |
| Screw length | How much take-up is available | Short screws run out of travel on thick work |
Checking both figures before buying avoids the most common disappointment: a clamp that opens wide enough but cannot reach past the edge of the assembly. When in doubt, the throat depth is the figure to buy up on, because a clamp that reaches too far is merely heavier, while one that does not reach is useless.
How the sizes divide the work
Small clamps are for control, medium clamps for general assembly, and large clamps for frames and panels. The dividing line is not the size of the workshop but the size of the joints being closed.
| Size | Typical work | Force available |
|---|---|---|
| 1 to 2 in | Small repairs, edge banding, fine joinery | Low, but easy to control |
| 3 to 4 in | Cabinet work, brackets, light frames | Moderate, enough for most glue joints |
| 5 to 6 in | General assembly and thicker sections | High; the workhorse sizes |
| 8 to 12 in | Frames, panels, doors and site work | Highest, with the reach to match |
For most workshops one pair of 6 in clamps does more work than a full set of small ones, and a pair of long clamps earns its place only when frames or panels are part of the regular work. Buying in pairs matters more than buying many sizes, because almost every clamping job needs two clamps working against each other.
G clamps in this range
Every option in this range
Seventeen configurations from 1 in to 12 in. Prices are per clamp.
| Size | Suits | Price |
|---|---|---|
| 1 in | Small repairs and fine work | $8.99 |
| 2 in | Light assembly and edge work | $8.99 |
| 3 in | Brackets and small frames | $15.06 |
| 4 in | Cabinet work | $17.32 |
| 5 in | General assembly | $22.13 |
| 6 in | The workhorse size for glue joints | $26.95 |
| 8 in | Larger frames and thicker sections | $26.97 |
| 10 in | Panels and doors | $26.97 |
| 12 in | Full frames and site work | $26.97 |
The price ladder is steep at the bottom and flat at the top, so the practical decision is made in the middle. Above 6 in the price barely moves, which means the largest clamp in the range costs very little more than the smallest large one, and buying the longer clamp is almost always the better value if storage allows.
Clamping without marking the work
- Put a scrap of softwood between each jaw and the workpiece to spread the pressure.
- Tighten until the joint closes, then stop; extra pressure starves the glue line rather than strengthening it.
- Place clamps opposite each other so the pressure pulls the assembly straight instead of bowing it.
- Check the assembly for square after the first clamp, before the others are tightened down.
- Keep the screw thread clean and lightly oiled so the pressure goes into the work and not into friction.
- Support the workpiece under the joint so the clamp is not also carrying the weight of the assembly.
Frame flex, threads and wear
A G clamp works by bending slightly under load: the frame flexes and the screw holds the tension. That flex is normal, but it is the reason a light clamp cannot be made to hold like a heavy one, because a frame that flexes too far will not close a stiff joint and will eventually take a permanent set.
The screw is the part that wears. Grit in the thread makes the clamp feel stiff and reduces the pressure it will develop, and a thread that has been run dry for years will gall and become rough. Cleaning the thread and applying a drop of oil restores most of the feel, and it is worth doing before a glue-up rather than during one. Rust on the frame is cosmetic unless it has reached the thread, and a clamp stored with the screw wound in keeps both the thread and the jaw faces protected.
Frequently Asked Questions
Is the size of a G clamp the opening or the length?
Normally the jaw opening. Always check the throat depth as well, because that is what decides whether the frame clears the workpiece.
What size clamp do I need for a cabinet?
A 4 in to 6 in clamp covers most cabinet work. Use 6 in where the assembly is thicker or the joint needs more pressure.
How much pressure should I apply?
Enough to close the joint and bring the surfaces together with a thin, even glue line. More pressure does not make a stronger joint.
Why does my clamp slip when I tighten it?
Usually a dry or dirty thread, or jaws that have become polished and hard. Clean and oil the thread, and use a pad between the jaw and the work.
Can I use a G clamp for welding?
Only a clamp made for it. Heat softens a standard frame, and spatter damages the thread, so a general-purpose clamp should be kept for assembly work.
Choosing the right one
Buy for the throat depth you need, not just the opening, and buy in pairs. The G clamp range runs from 1 in to 12 in, which covers fine joinery through to full frames.