Blog
Tin Snips Technique: Cut Patterns, Circles and Clean Lines


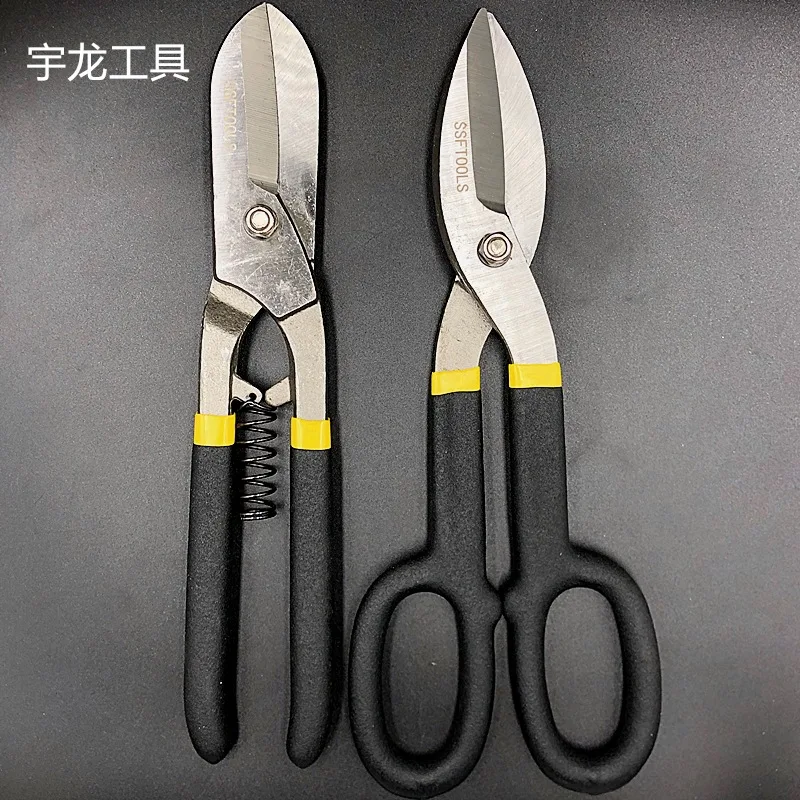
Tin snips will cut a sheet in any direction you ask, provided you ask the right way. Most of the bad cuts blamed on the tool come from three habits: taking a bite that is too big, trying to steer the cut instead of letting the blades follow it, and turning a curve in the wrong direction for the pattern. This range covers two lengths in standard and accessory-supplied form, and this guide covers the technique that keeps a cut on the line and the sheet flat.
The three cut directions
- Straight pattern. Symmetrical blades that cut straight ahead and turn shallow curves in either direction. The general-purpose choice.
- Left pattern. The blades are offset so the offcut curls left, which lets the tool follow a curve to the left while the sheet stays flat on the bench.
- Right pattern. The mirror of the left pattern, for curves running the other way.
- Circles need relief cuts. No hand snip cuts a full circle in one pass. Cut a set of straight relieving cuts up to the line and remove the waste between them.
- Inside curves need a starting hole. For a cut that begins inside the sheet, drill or punch a hole first, then feed the blade in and work outward.
- Thin sheet turns more easily than thick. The same curve that a blade follows in 0.5 mm aluminium will kink in 1 mm steel, where relief cuts are the only route.
Pattern against the cut
| Pattern | What it does | Suits | Limit |
|---|---|---|---|
| Straight | Cuts straight, shallow curves both ways | General sheet work and trimming | Cannot hold a tight curve in either direction |
| Left | Offcut curls left, blade follows a left curve | Circular and long left-hand curves | Awkward cutting to the right |
| Right | Offcut curls right, blade follows a right curve | Mirrored work and right-hand curves | Awkward cutting to the left |
| Either, with relief cuts | Straight bites joined into a curve | Circles, inside curves and thick sheet | Slower, and leaves edges to dress |
Where a job is mostly curves, a matching left and right pair is worth owning, because the pattern is what keeps the sheet flat while the blade turns. Where the job is straight cuts and the occasional shallow curve, the straight pattern does everything.
The tin snips in this guide
Every option in this range
Eight options across two lengths, in a plain pattern and in a version supplied with accessories. Prices are per unit.
| Option | Length | Supplied as | Best for | Price |
|---|---|---|---|---|
| Standard snips | 10 in | Plain pattern | General cutting and trimming | $8.99 |
| Accessory version | 10 in | Supplied with accessory | Regular use where the extra part is wanted | $11.02 |
| Standard snips | 12 in | Plain pattern | Longer cuts and thicker sheet | $11.58 |
| Accessory version | 12 in | Supplied with accessory | Trade use with the extra part on hand | $13.24 |
The accessory versions cost about two dollars more than the plain pattern in the same length, which is roughly the cost of the extra part bought separately. If the part is something you would buy anyway, the supplied version is the better value; if not, the plain pattern cuts exactly the same sheet.
Technique that keeps the cut on the line
- Take small bites. Around half the blade length per stroke. A full-length bite in thick sheet twists the offcut and pulls the cut off line.
- Let the blades steer. Push the tool along the line and let the pattern turn the cut. Forcing the handles sideways spreads the blades and chews the sheet.
- Keep the sheet flat and supported. Cut over a bench edge or a clear span. A sheet that is allowed to droop pinches the blades and kinks at the cut.
- Lift the offcut as you go. The waste curling upward over the blade is what jams a cut. Guide it down and away with your free hand.
- Thin the last millimetre. For a cut that has to be exact, leave the final trim shallow and take it in one light pass with the blades fully open.
- Dress the edge after cutting. A cut edge is sharp on both sides. A quick pass with a file or a deburring tool is the difference between a finished panel and a cut hand.
Faults and their causes
| What you see | Usual cause | Fix |
|---|---|---|
| Cut curves away from the line | Bites too long, or handles forced sideways | Shorter strokes, let the pattern steer |
| Sheet kinks beside the cut | Sheet not supported, or blade riding over it | Support the sheet and check the blades are not spread |
| Blades chew rather than shear | Spread blades or a notched edge | Check the pivot, then inspect the edge for damage |
| Snips jam in the cut | Offcut curling over the upper blade | Guide the offcut down as you cut |
| Cut will not follow a tight curve | Blade too long for the radius | Relief cuts up to the line, then trim |
Frequently Asked Questions
Why will my snips not cut a circle?
Because no hand snip can. Cut a series of straight relieving cuts from the edge up to the line and take the waste out in strips, then dress the edge.
Should I buy left and right patterns?
Only if most of the work is curved. For straight cuts and occasional shallow curves, a straight pattern pair does the same job with fewer tools to carry.
Why does the sheet kink at the cut?
Usually because it is unsupported or the blades have spread and are riding over the metal instead of shearing it. Support the sheet and check the blade clearance.
Can I sharpen tin snips myself?
Yes, on the cutting bevel at the existing angle with a fine stone. Never grind the flat face, because the flat face sets the clearance that lets the blades shear.
What is the accessory version for?
It supplies the part most often bought alongside a pair of snips, so the tool arrives ready for regular use. If you would not buy that part anyway, the plain pattern is the better value.
Buying the right one
Buy the 10 inch pattern for general work and the 12 inch where the cuts are long, and add relief cuts to your technique rather than buying a bigger tool. The tin snips in this range cover both lengths in plain and accessory-supplied form.