Blog
Marking Gauge Sizes: 200 mm, 250 mm and 300 mm Beams

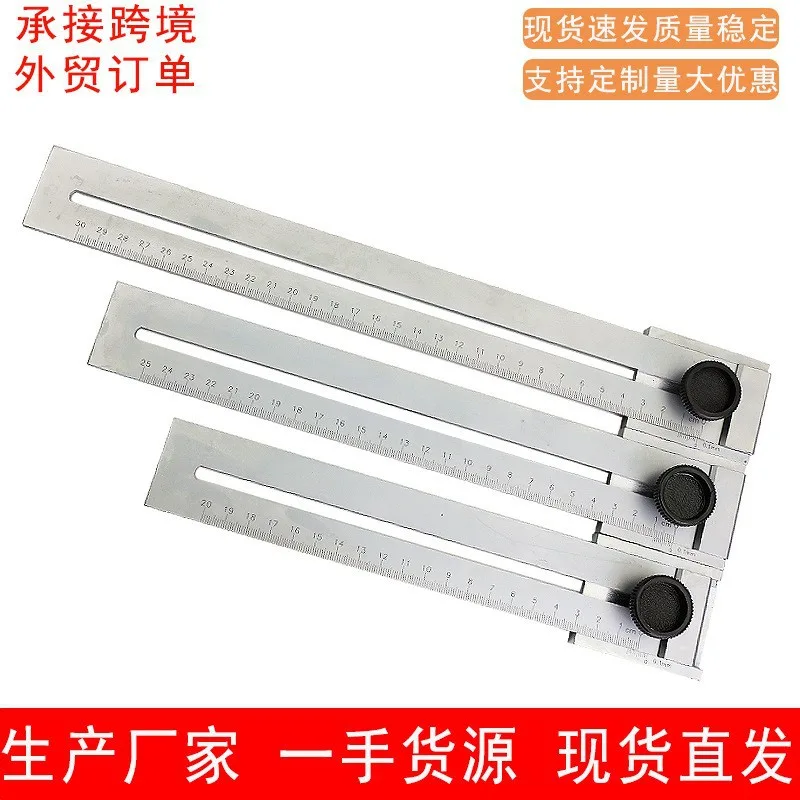
A marking gauge is worth owning because it marks a line parallel to an edge without a ruler and without a measurement error being repeated on every piece. The length of the beam is what sets how far from the reference edge that line can be drawn, and it is the only dimension that really changes between sizes. This range covers three lengths, and this guide explains what each one reaches, when a longer beam stops helping, and how the stock and the beam interact on thicker work.
What the beam length decides
- Maximum offset from the edge. The beam has to reach from the fence to the line, so a short beam cannot set a wide rebate.
- Stability on narrow stock. A long beam overhanging a narrow board is more likely to dip and mark a curve rather than a line.
- Reach across a panel. Where a line is set well in from the edge, only a long beam can be set to it.
- Weight and storage. Longer gauges are bulkier, which matters if the tool lives in a small box rather than on a bench.
- Nothing else changes with length. The fence, the locking screw and the pin or blade are the same across the range, so the choice is purely about reach.
- A longer beam does not mark more accurately. Accuracy comes from the fence sitting flat against the reference edge, not from the length of the beam.
Beam length against the job
| Length | Reaches | Suits | Limit |
|---|---|---|---|
| 200 mm | Lines set up to about 200 mm from the edge | General joinery, drawer parts, small panels | Not enough reach on wide panels |
| 250 mm | A little further, with more beam to hold | Wider rails and stiles, general bench work | Slightly more overhang on narrow stock |
| 300 mm | The longest offsets in the range | Wide panels and setting out large work | Bulkier, and easy to dip on narrow stock |
Most bench work fits inside 200 mm, which is why that size is the cheapest and the one bought most often. Stepping up a size is only worthwhile when the lines you set really do sit further from the edge; otherwise the extra beam is weight you carry and a longer lever to keep flat.
The marking gauges in this guide
Every option in this range
Three lengths at three price points. Prices are per unit.
| Length | Supplied as | Best for | Price |
|---|---|---|---|
| 200 mm | Single gauge | General joinery and small panels | $8.99 |
| 250 mm | Single gauge | Wider rails and stiles | $10.15 |
| 300 mm | Single gauge | Wide panels and setting out large work | $12.09 |
The price steps are gentle, about a dollar and a half per size. That makes it tempting to buy the longest, but the useful test is to measure the widest line you actually set in a month: if it is inside 200 mm, the shortest gauge does everything and is easier to handle on narrow stock.
Beam thickness and stock
The thickness of the beam matters on thick work. A slim beam sits low against the fence and can flex when it is pressed down, which lifts the pin off the surface and leaves a line that fades. A thicker beam holds its line under the same pressure. On thick timber the whole gauge also has to sit square: with the fence against the reference face, the beam has to be at right angles to it, and on a badly cut edge no gauge will mark a true parallel line.
Setting the gauge is where most of the accuracy comes from. Measure from the fence face to the pin with a rule, then lock the screw and check the setting again, because the act of tightening moves the beam a fraction on some designs.
Marking technique
- Set from the fence, not from the pin end. The distance that matters is measured from the face that rides the reference edge.
- Lock firmly and re-check. Tightening the screw can shift the beam. Confirm the setting before marking anything of value.
- One pass only. A gauge scores a line in one stroke. Going over it again widens the mark and flattens the pin.
- Angle the pin slightly into the waste. A pin set to lean away from the line marks with its tip and leaves a clean line.
- Keep the fence flat against the edge. Tilting the gauge makes the line drift away from parallel along the length of the board.
- Work with the grain where you can. A pin dragged across end grain tears the fibres where a blade gauge would slice them.
There is one more use for a long beam that is easy to overlook. Set a gauge wider than the job needs and it doubles as a depth check, run along a rebate or a groove to confirm that the bottom is flat and at a consistent depth. The longer the beam, the further into a wide panel that check will reach.
Frequently Asked Questions
What length marking gauge do I need?
Measure the widest offset you set in normal work and add a margin. Most bench joinery fits inside 200 mm, and large panel work is where the longer beams earn their place.
Does a longer gauge mark more accurately?
No. Accuracy comes from the fence riding the reference edge squarely and from the setting being correct. Length only extends the reach.
Can I use one gauge for everything?
Yes, if the longest line you set is within its range. A short gauge used at its limit is less stable than a longer one used in the middle of its range.
Why does my gauge line fade out?
Usually the beam is flexing under hand pressure, or the pin has been flattened by marking over an existing line. Check the pin first, then the beam.
Do I need more than one gauge?
Only if you set the same offset repeatedly, in which case a second gauge left at that setting saves re-measuring. Length alone is rarely a reason to own two.
Buying the right one
Buy the shortest beam that covers the lines you set, and let the fence, not the length, do the accurate work. The marking gauges in this range cover 200 mm, 250 mm and 300 mm.